This post is also available as a PDF document.
After Ifttt we want to look at another service on the web today. He will help us to easily present measurement data from our ESP32 as a graphic plot. Like IFTTT, this service is free and does not even contain restrictions on the number of Applets. If it was the Method Post with iftt at HTTP access, it will be the method here. What is the difference? At GET the request to the server takes place in an access. You may know this from the presentation of search queries, such as the following form.
https://server.domain.com/dateien/templates?app=openoffice&revision=23
The browser assembles a Get request from such lines. These kind of inquiries are limited to relatively few characters. The respective server decides how many are possible.
A post-request takes place in two steps. First a connection is established and the data is shipped in the second step. This type of request is used when a lot of data is to be sent, for example from an HTML form.
Some servers accept both methods, others prescribe the method. You are welcome to try it out. The contribution shows how a post is put together Ifttt.
But now we take a look at Thingspeak. This is the name of the service that I have in this episode from the series
Micropython on the ESP32 and ESP8266
today
Thingspeak plot the values of the ESP32
Do you miss the ESP8266 here? Yes, I left it out because his memory is too narrow -breasted for the driver of the BME280. In principle, of course, the values of an ESP8266 can also be sent to Thingspeak. You only have to switch to other sensors that use a slimmer driver, such as the SHT21 or the AHT10. The air pressure sensor is missing in these modules.
There is also another sensor on board today, a BH1750. Like the BME280, it is controlled via the I2C bus and delivers brightness values in Lux. Boss of the service is an ESP32 Dev Kit V4. Of course, the other family members who are listed in the following list are also suitable.
Hardware
In order to be able to view the condition of the circuit at any time on site, I donated a display to the ESP. The flash key can be used to demolish the program, for example, actuators have to be switched off safely, such as the LED.
|
1 |
ESP32 Dev Kit C V4 unplacerated or |
|
1 |
|
|
1 |
GY-BME280 barometric sensor for temperature, air humidity and air pressure |
|
1 |
LED, for example red |
|
1 |
Resistance 330 Ω |
|
2 |
|
|
1 |
|
|
various |
Jumper Wire cable 3 x 40 pcs. 20 cm M2M / F2M / F2F each possibly too |
|
optional |
So that slots for the cables are still free next to the controller, I have put two Breadboards together with a power rail in between.

Figure 1: Structure Ambant-Meter
And here is the circuit diagram:

Figure 2: circuit ambantic meter
The software
For flashing and the programming of the ESP32:
Thonny or
Used firmware for the ESP32:
Used firmware for the ESP8266:
The micropython programs for the project:
SSD1306.PY Hardware driver for the OLED display
oled.py API for the OLED display
bme280.py Driver for the BME280 module
bh1750.py Driver for the BH1750 light sensor
urequests.py Driver module for HTTP operation
timeout.py Softwareimer module
thingspeak.py Demo program for Thingspeak
Micropython - Language - Modules and Programs
To install Thonny you will find one here Detailed instructions (English version). There is also a description of how that Micropython firmware (As of 18.06.2022) on the ESP chip burned becomes.
Micropython is an interpreter language. The main difference to the Arduino IDE, where you always flash entire programs, is that you only have to flash the Micropython firmware once on the ESP32 so that the controller understands micropython instructions. You can use Thonny, µpycraft or ESPTOOL.PY. For Thonny I have the process here described.
As soon as the firmware has flashed, you can easily talk to your controller in a dialogue, test individual commands and see the answer immediately without having to compile and transmit an entire program beforehand. That is exactly what bothers me on the Arduino IDE. You simply save an enormous time if you can check simple tests of the syntax and hardware to trying out and refining functions and entire program parts via the command line before knitting a program from it. For this purpose, I always like to create small test programs. As a kind of macro, they summarize recurring commands. Whole applications then develop from such program fragments.
Autostart
If the program is to start autonomously by switching on the controller, copy the program text into a newly created blank tile. Save this file under boot.py in WorkSpace and upload it to the ESP chip. The program starts automatically the next time the reset or switching on.
Test programs
Programs from the current editor window in the Thonny-IDE are started manually via the F5 button. This can be done faster than the mouse click on the start button, or via the menu run. Only the modules used in the program must be in the flash of the ESP32.
In between, Arduino id again?
Should you later use the controller together with the Arduino IDE, just flash the program in the usual way. However, the ESP32/ESP8266 then forgot that it has ever spoken Micropython. Conversely, any espressif chip that contains a compiled program from the Arduino IDE or AT-Firmware or Lua or ... can be easily provided with the micropython firmware. The process is always like here described.
We build a thingspeak account
Follow me on that Home of Thingspeak.
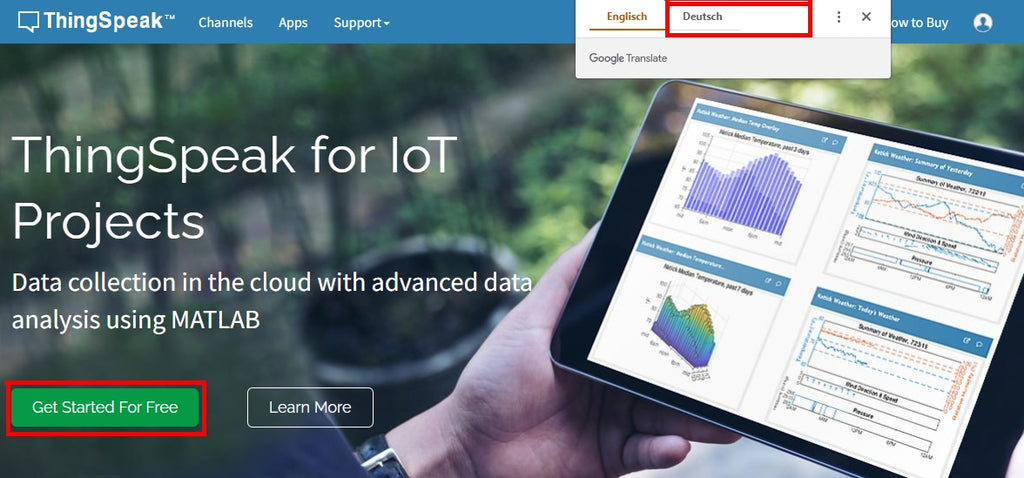
Figure 3: Start window (source: https://hingspeak.com)
The first time the language is called, the voice selection appears. It continues with Get starts for free.

Figure 4: Set up account (source: https://hingspeak.com)
First of all, you have to set up a mathworks account. Enter your email address here. With Next it continues to record some personal data.

Figure 5: Record personal data (source: https://hingspeak.com)
Continy, leads to the next window. Put the hook with Use this email for my mathworks account – Continy.

Figure 6: Use private address for the account (source: https://hingspeak.com)

Figure 7: Verify email address (source: https://hingspeak.com)
Now you should look into your mailbox whether you have received an email with which you can confirm the email address via link.

Figure 8: Confirm email address (Source: https://hingspeak.com)
Now a password for the new account is expected. It doesn't have to be that of your email provider. Attention, the password is not verified, the check mark and - Continy.

Figure 9: Create password (source: https://hingspeak.com)
In the following window, select one of the applications. Then they end up on the side where you can manage your channels. Because nobody still exists, click on New channel. If you come from the Home of Thingspeak, open in the menu channels the point My channels. They also end up on the administrative side.

Figure 10: Start window after creating the account (source: https://hingspeak.com)
click on New channel:

Figure 11: Create a new channel (source: https://hingspeak.com)
For our project we need four fields for temperature, rel. Air humidity, air pressure and brightness. I chose daily values as the name. Before the fields can be labeled, the check mark must be set. Then: Save Channel.

Figure 12: My fields (source: https://hingspeak.com)
As a summary we get an overview:

Figure 13: Summary (Source: https://hingspeak.com)
In the API Keys folder, you get all the necessary information necessary to send requests. First of all, there are the keys for writing and reading access:

Figure 14: The access keys for writing and reading (source: https://hingspeak.com)
You will also find the URL lines for writing and reading access at the bottom right. The lines can do without that Get are copied into the address field of a browser to trigger the desired process. We will copy the line for writing in an extended form for our four measured values.

Figure 15: Access to the channel with GET (source: https://hingspeak.com)
The program
As usual, we start with the import business. The following files must be uploaded to the flash of the ESP32 beforehand: SSD1306.PY, oled.py, bh1750.py, bme280.py and timeout.py. Everything else is made available by the kernel of Micropython.
 From machine import Pin code, Softi2c
 From time import sleep
 From OLED import OLED
 From BH1750 import BH1750
 From BME280 import BME280
 import requests
 import network, socket
 import sys, OS
 From time-out import *
 import GC
The import of time-out through the star all objects are directly into the global scope (AK name room) of the main program Thingspeak.py accepted. This eliminates this, otherwise usual, objectPrefix When calling the functions.
The API key and channel number are announced.
THPWritekey="--- Your writing key ---"
THSPKREADKEY="--- Your reading key ---"
THSPKcannel="--- Your channel number ---"
interval=1000 # MS until the first recording
follow -up interval=60000
myssid = 'Empire_of_ants'; mypass = "Nightingale"
I use the interval from starting the main loop to the first recording for a second, the follow -up -intervals for one minute. This is followed by the credentials for contacting the WLAN router.
The program module for instantiation of the I2C bus would not be necessary here because only one ESP32 can handle the program anyway. I just save myself after inserting through copy and paste.
 IF sys.platform == "ESP8266":
     I2C=Softi2c(scl=Pin code(5),sda=Pin code(4))
 elif sys.platform == "ESP32":
     I2C=Softi2c(scl=Pin code(22),sda=Pin code(21))
 Else:
     raise Runtime("Unknown Port")
With the I2C object, we immediately create the display object, the BME280 and the BH1750 instance.
D=OLED(I2C,Heightw=64) # 128x64 pixel display
D.contrast(255)
D.writer("Ambient Data",2,0)
BME=BME280(I2C)
bra=BH1750(I2C)
The dictionary (short dict) connect status translates the meaningless numbers that the function nic.status() returns with the router when building a connection, in plain text.
 connect status = {
     1000: "Stat_idle",
     1001: "Stat_Connecting",
     1010: "Stat_got_ip",
     202:  "Stat_wrong_Password",
     201:  "No ap found",
     5:    "Unknown",
     0: "Stat_idle",
     1: "Stat_Connecting",
     5: "Stat_got_ip",
     2:  "Stat_wrong_Password",
     3:  "No ap found",
     4:  "Stat_Connect_Fail",
     }
With the function hexmac() We learn the MAC address of the controller's station interface in plain language. This must be entered in the router, otherwise it will refuse access to the controller. Most of the time, the entry is via the WLAN security menu. The precise procedure reveals the manual of the router.
We feel the bytes object that the functional call nic.config ('Mac') Delivers, signs of signs, make it a hexadecimal number and build the string that the function returns.
 def hexmac(bytemac):
   """
   The HexMac function takes the MAC address in the bytecode
   opposite and forms a string for the rehabilitation
   """
   MacString =""
   for I in range(0,len(bytemac)):     # For all byte values
     MacString += hex(bytemac[I])[2:]  # from position 2 to the end
     IF I <len(bytemac)-1 :            # Delimiter
       MacString +="-"
   return MacString
Handishly look like this:
>>> nic.config('Mac')
B '\ XF0 \ X08 \ XD1 \ XD1M \ X14'
>>> hex(M[0])
'0xf0'
>>> hex(M[0]) [2:]
'0xf0'
>>> hex(M[0])[2:]
'F0'
The connection with the WLAN router follows. To do this, we switch on the station interface, the controller works as a client. The switching second afterwards is important and avoids internal WLAN errors that occur sporadically.
# ******************* Boat Sequence *********************
#
nic = network.WIRELESS INTERNET ACCESS(network.Sta_if) # creates WiFi object Nic
nic.active(True) # Nic turn on
sleep(1)
Mac = nic.config('Mac') # Call base Mac address and
mymac=hexmac(Mac) # converted into a hex digit sequence
print("Mac station: \ t"+mymac+"\ n") # spend
We read the MAC address, let them form in plain text and output it in the terminal.
 IF need nic.Isconnected():
   nic.connect(myssid, mypass)
   print("Status:", nic.Isconnected())
   D.writer("WLAN Connecting",0,1)
   point="............"
   n=1
   while nic.status() != network.Stat_got_ip:
     print(".",end='')
     D.writer(point[0:n],0,2)
     n+=1
     sleep(1)
If the interface has no connection to the router, we will provide you with connect() one. SSID and password are transmitted. The status is queried and output. As long as we from DHCP-Server of the router has not yet received a IP address, one point is issued at a second distance. That shouldn't take longer than 4 to 5 seconds.
Then we ask the status and have the connection data, IP address, network mask and gateway.
 print("\ nstatus:",connect status[nic.status()])
 D.clearall()
 Staconf = nic.ifconfig()
 print("Sta-IP: \ t \ t",Staconf[0],"\ nsta-netmask: \ t",Staconf[1],\
                     "\ nsta-gateway: \ t",Staconf[2] ,sep='')
 D.writer(Staconf[0],0,0)
 D.writer(Staconf[1],0,1)
 D.writer(Staconf[2],0,2)
 sleep(3)
 D.clearall()
 D.writer("Ambient Data",2,0)
NEXTMEMAALEMENT=Timeoutms(interval)
The first measurement value is prepared by the timer NEXTMEMAALEMENT place on 1000 ms. Then it goes into the Mainloop, which only serves two events, the expired timer and the key query.
Plus a short remark. Time-out() is a function in which the code body is another function with the name compare() is declared. compare() is a so -called closure. The special thing about it is that this function after leaving the surrounding function Time-out() cannot be composted, but can continue to be referenced. This is made possible by two circumstances. One is that compare() The Time-out() handed over time referenced and also the time stamp in begin. The second reason is that Time-out() a reference on compare() returns. We save them here in NEXTMEMAALEMENT away. NEXTMEMAALEMENT is called callable, we ultimately refer the closure when calling compare(). If you want to learn more about closures, follow this link.
 def Timeoutms(T):
     begin=Ticks_MS()

     def compare():
         nonlocal begin
         IF T==0:
             return False
         Else:
             return intimately(Ticks_MS()-begin) >= T
     print (ID(compare))
     return compare
 >>> NEXTMEMAALEMENT=Timeoutms(interval)
 1073713376
 >>> ID(NEXTMEMAALEMENT)
 1073713376
Here you have the proof that IDS of compare() and NEXTMEMAALEMENT() are identical
In the main loop, we first ask the timer by the function compare() via NEXTMEMAALEMENT() call. As long as the timer is still running, we receive as a return False. But is Ticks_MS - start We get Gößer than 1000 True And enter the code body of the IF construct.
 while 1:
     IF NEXTMEMAALEMENT():
         red.on()
         NEXTMEMAALEMENT=Timeoutms(follow -up interval)
         tempo=BME.Calct temperature()
         humble=BME.Calchumidity()
         pres=BME.calcressure()
         lum=bra.luminance()
The LED is switched on and the timer restarted, this time with the 60-second interval. Then we get the values from the sensors and output them on the display. The False In the first four lines, the text is only written in the data buffer in the ESP32. The optional keyword parameter comes in the 5th line show With the default value True to carry. Only now is the buffer content sent to the display. This procedure calms down the display.
         D.clearft(0,1,15,4,False)
         D.writer("Temp: {: .2f}".format(tempo),0,1,False)
         D.writer("Rhum: {: .2f}".format(humble),0,2,False)
         D.writer("Pres: {: .2f}".format(pres),0,3,False)
         D.writer("Lumi: {: .2f}".format(lum),0,4)
Then we send a Get Request to Thingspeak. Everything we have to do is create a URL string according to the above pattern. We tinker the numerical values through the formatting strings {: .2F} into the text. We send all four values in a dishes.
 r=requests.get("https://api.dingspeak.com/update?api_key="+ THPWritekey+"& field1 = {:. 2f}".format(tempo)+"& field2 = {:. 2f}".format(humble)+"& Field3 = {:. 2f}".format(pres)+"& Field4 = {:. 2f}".format(lum))
         print(r.junk.decode(),r.text)
         status=r.junk.decode()+"; "+r.text
         D.writer(status,0,5)
         r.close()
We put the server's answer in the variable r away. r Is an instance of the class Responsethat in the module requests is defined. The transmission status in junk And we spend the text of the answer in the terminal and the display. Then we close the connection properly. If we do not do this, we would get an error message with a program termination at the next run.
The rest is done quickly. If the button is pressed, the LED will be switched off and the program is left.
     IF button.value()==0:
         red.off()
         sys.exit()
On the website https://ThingSpeak.com/channels/XXXXXXX/Private_Show you can now track the recording of the measured values. Of course you have to X-e replace with your channel number.
The next episode is about a telegram bot. This will enable us not only to receive data, but also to provide switching commands.
See you then!


